Why Learn How to Install Tile
Installing tile is one of the most satisfying DIY home upgrades. It makes a huge difference in style and adds long-term durability. Homeowners who learn how to install tile often save money and gain more control over their design.
If you live in or near Walkersville, MD, quality tile work also boosts your home’s value. Modern buyers in counties like Frederick, Howard, and Montgomery expect updated finishes, and a fresh tile floor or backsplash makes a strong impression.
Step 1: Gather Your Tools and Materials
Before starting your step-by-step tile installation, gather all the right tools and supplies. Preparation makes the job easier and helps you achieve a neat, even finish.
Essential Tools
- Tape measure and chalk line
- Notched trowel
- Tile spacers
- Level and straightedge
- Tile cutter or wet saw
- Mixing paddle and bucket
- Grout float and sponge
Materials
- Chosen tiles (ceramic, porcelain, or natural stone)
- Thin-set mortar or adhesive
- Grout
- Backer board or cement board (for bathrooms or kitchens)
- Sealer (for natural or porous tiles)
If you’re unsure which materials suit your space, our team at Frederick Kitchens & Bathrooms can help you select the right tiles, adhesives, and finishes. Visit our tile design and installation page to see more options.
Step 2: Prepare the Surface
Proper surface preparation is the foundation of a successful DIY tile installation. Skipping this step can lead to uneven or cracked tiles later.
- Clean the surface. Remove all debris, grease, or old adhesive.
- Check for level. Fill in low spots or uneven areas with a leveling compound.
- Install a backer board. Especially in kitchens and bathrooms, this adds moisture protection.
- Seal seams. Use tape and thin-set mortar on joints for stability.
Take your time with this step. A smooth, solid base ensures long-lasting results.
Step 3: Plan Your Layout
Before spreading adhesive, plan your layout carefully. Good planning prevents awkward cuts or uneven spacing.
- Mark the center. Use chalk lines to mark the midpoint of the room.
- Dry-lay tiles. Place tiles on the floor without mortar to see how they fit.
- Adjust placement. Shift your pattern to avoid small edge tiles.
If your tile project connects to other design work, coordinate it with your custom cabinetry or countertop installation for a seamless look.
Step 4: Mix and Apply Mortar
Mix thin-set mortar following package directions until it’s smooth and spreadable.
- Mix thoroughly. Use a drill with a mixing paddle to blend water and powder evenly.
- Spread in small sections. Apply mortar with a notched trowel at a 45-degree angle.
- Comb the surface. Create grooves so tiles grip firmly.
Only spread what you can tile within 10 to 15 minutes. Working in smaller sections keeps mortar from drying too quickly.
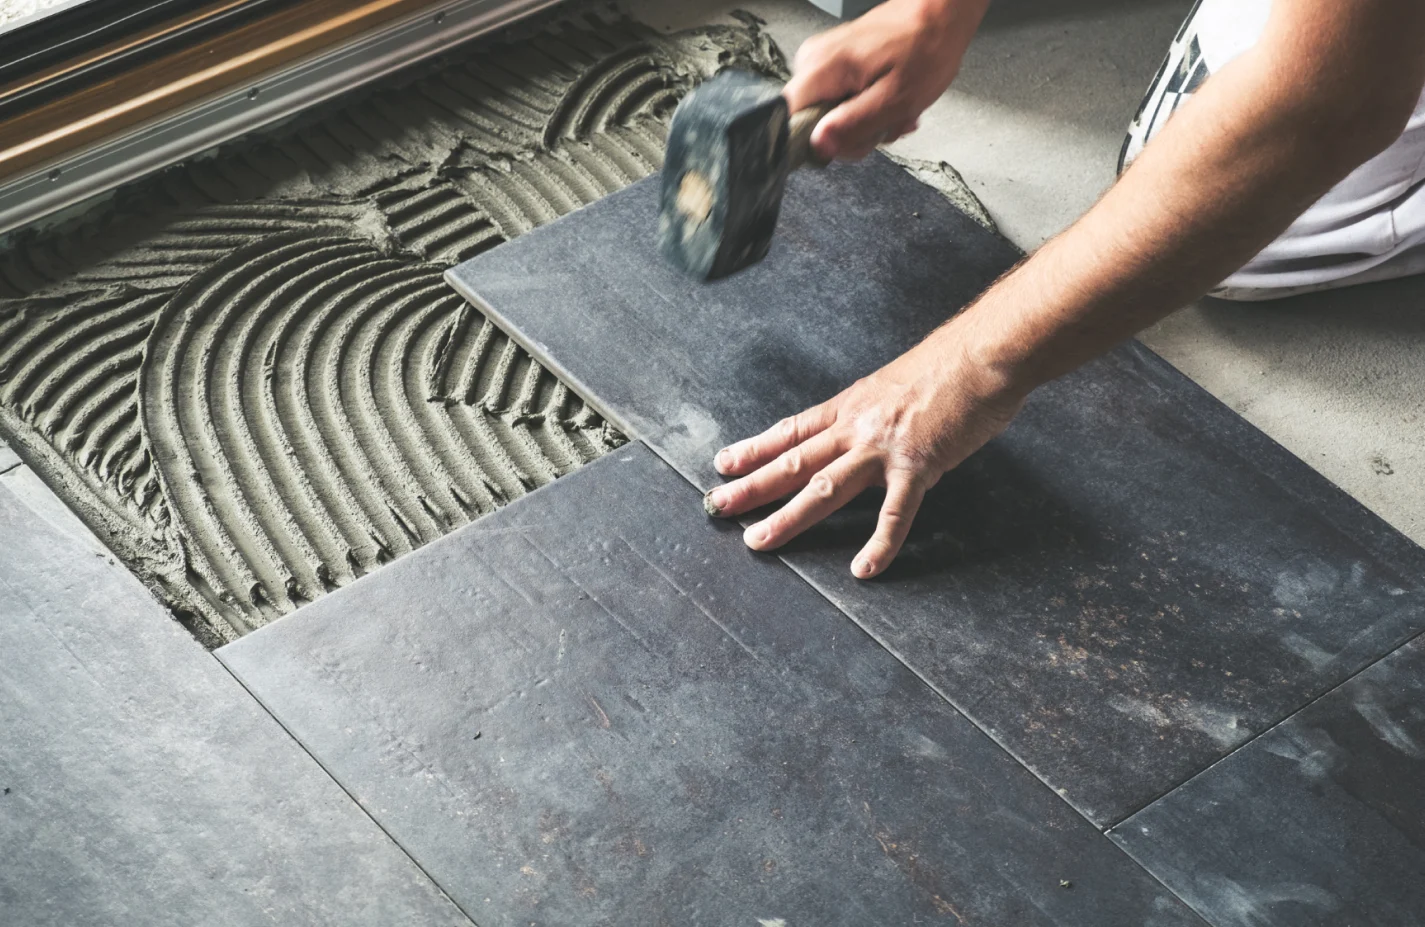
Step 5: Lay the Tiles
Now it’s time to place the tiles on the adhesive.
- Start at the center. Press the first tile gently into the mortar.
- Add spacers. Place spacers between tiles for uniform gaps.
- Check alignment. Use a level frequently to keep rows straight.
- Continue outward. Work your way across the area systematically.
If you prefer unique patterns like herringbone or diagonal designs, test your layout first. For larger or detailed projects, consider professional help through our flooring installation services team.
Step 6: Cut Tiles to Fit
You’ll need to trim tiles to fit along edges, around outlets, or near fixtures.
- Straight cuts: Use a manual tile cutter.
- Curved or notched cuts: Use tile nippers or a wet saw.
- Safety first: Wear goggles and gloves when cutting.
Proper cutting ensures a clean, professional look and helps tiles fit perfectly against walls and trim.
Step 7: Let the Tiles Set
Once all tiles are placed, allow them to dry for at least 24 hours. Don’t walk on the area or disturb the tiles while the mortar cures. This ensures a strong, stable bond.
Step 8: Apply Grout
When the tiles are firmly set, it’s time to fill the gaps.
- Mix the grout. Blend until it reaches a smooth consistency.
- Spread diagonally. Use a rubber float to press grout into joints.
- Clean excess. Wipe the surface gently with a damp sponge.
- Let it cure. Allow a full day for the grout to harden.
If your tile is porous, apply a grout sealer to prevent moisture absorption.
Step 9: Clean and Seal the Surface
After the grout cures, wipe away any haze or leftover residue. Sealing the tile surface protects it from stains and moisture. For natural stone or unglazed tiles, sealing is essential.
Keep the surface clean with mild cleaners, and avoid harsh chemicals that could damage grout lines.
Step 10: Tile Installation Tips from the Pros
These tile installation tips will help your project go smoothly:
- Buy extra tiles (about 10% more than measured area) for cuts or future repairs.
- Mix tiles from multiple boxes for consistent color blending.
- Check spacing and level as you go.
- Don’t rush drying times.
- Reseal grout periodically to maintain strength.
If you need more help or want to ensure flawless results, our team can handle your project with full project management services for smooth coordination.
Common Mistakes to Avoid
Avoid these errors during your tile installation process:
- Ignoring surface prep.
- Using the wrong trowel notch size.
- Skipping spacers or leveling checks.
- Applying grout before tiles have cured.
Taking your time prevents future cracking or uneven surfaces.
Choosing the Right Tile
Each room needs tiles suited for its conditions.
- Kitchens: Choose easy-to-clean porcelain or ceramic.
- Bathrooms: Go with water-resistant options and slip-safe textures.
- Entryways: Pick durable, non-slip tiles.
- Backsplashes: Try decorative glass or mosaic for creative flair.
You can explore tile samples at our showroom in Walkersville, MD, or schedule a consultation with our design team.
When to Call a Professional
DIY projects can be rewarding, but large areas, shower walls, and detailed patterns are easier with professional installers.
At Frederick Kitchens & Bathrooms, we manage everything from surface prep to tile cutting and sealing, ensuring long-lasting beauty and durability. We also coordinate with plumbing and framing teams for safe, code-compliant installations.
Conclusion
Now that you know how to install tile, you can confidently start your next home improvement project. This step-by-step tile installation guide gives you everything you need to plan, prepare, and finish like a pro. Whether you’re upgrading a kitchen backsplash or a bathroom floor, following these tile installation tips ensures a clean, durable, and attractive result.
How Frederick Kitchens & Bathrooms Can Help
At Frederick Kitchens & Bathrooms, we help homeowners bring their remodeling visions to life. From tile installation to kitchen remodeling and bathroom renovation, our trusted team delivers high-quality craftsmanship with reliable, on-time completion. Call (301) 845-7070 today for your free estimate and ask about our veteran discounts.